Production process

Igsa seedlings must be transplanted twice according to their growth. Rearrange the first seedlings which grew in the field (seedling bed) in paddy nursery in August. Then dig up the second seedlings which grew there in late November. Both requires physical strength, and the work is called root division which divides the complicatedly intertwined 2nd seedlings into a few pieces for planting to the field is a hard labor which requires patience.


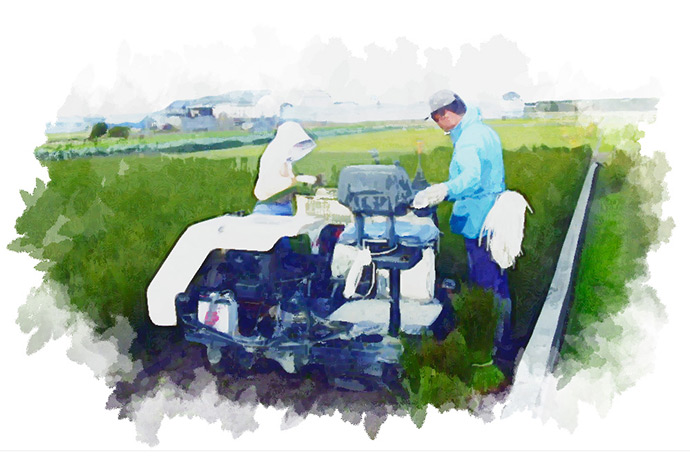
In early December, we plant seedlings which were divided into a few pieces in the field. Now, most of the farmer uses transplant machines, but of course, it was a work that was done by hand in the old days. Crouching down to a cold paddy field in winter, carefully planting seedlings one by one while checking the feel of seedlings and soil with bare hands. All the family members from adults and children participated in this work.


After half a year of planning, around May, prompt germination of sprouts by cutting the tip of igsa so that the sunshine strikes the root of the growing igsa. This process is necessary because it is said that the bud that comes out about 45 days before the harvest will become a high quality igsa. This process is done by two people with using the exclusive pre-cutting machine and fixing the heights perfectly, and it makes thick and pliant igsa.


When igsa grows up well in aroung May, stake paddy fields and build nets. This is an important work to prevent igsa from falling down due to strong wind. The sun helps growing them to a height of 150cm or more. Today, low varieties of igsa that are difficult to collapse by the wind also have been developed, but as long as it is that has a better quality, the old-fashioned way is being kept.


The late June to the mid July is the season of harvesting. Remove the net from paddy fields and cut the completely growing igsa with the machine. The time of the harvest is early morning or evening when the temperature is low. This is because to prevent harvested igsa from being heated or discolored due to strong sunshine during the daytime. The beautiful green gradation of beautifully bundled igsa is so impressive.


Dye the harvested igsa with mud on that day. Mudding is a method of igsa processing using natural soil which has been used since the middle of the Edo period. By doing this work, igsa gathers a calm scent of tatami, beautiful color, and gloss. After the mudding, move to the drying process with the machine. When this process is over, making tatami mat process will begin.


Once sorted the dried igsa by length, check the scratches and its thickness. Only those selected high quality of igsa will be put on weaving machine and finally weaving process starts. A QR code tag is inserted into a tatami mat that is woven with rhythmic mechanical sounds. This not only guarantees the high quality of Kumamoto tatami but it also helps to distinguish it from other production areas such as China and to prevent the production place camouflage.


The final process is check the weaved tatami mats one by one and make sure that none of them has scratches. Various technologies innovated and machines took over quite a lot of the process of tatami mat making. However this finishing process depends on craftsman’s eyes and the sense. Adjust weave non-uniformities with their experiences and concentration, and the tatami mat is completed.


After completion of the finishing process, the tatami mats get further rigorous inspections based on the Kumamoto prefectural tatami mat inspection standard. High-quality Kumamoto tatami is maintained not only by craftsmen's check but also by such external inspection. If they pass this inspection, they get the official seal and this is the completion of the Kumamoto tatami mat. Domestic display stickers, product label, etc. are attached and they will be shipped to all over Japan.


Completion of "tatami" that we know well by covering the tatami mat with rice straw on the compressed tatami floor and sewing the edge on the long sides. Measurement is very important when lay out tatami mats at home, because it is necessary to adjust tatami mats according to slight protrusions of pillars, curves of the walls and the doorsills. Tatami makers who goes to the work site’s careful job complete tatami mats which fits without any gaps.